
Team
My fiance, Mike Saunders, and me.
Role
Mike and I have collaborated on the design of the bus conversion, and I have brought these designs to life both as Fusion models and through the construction process.


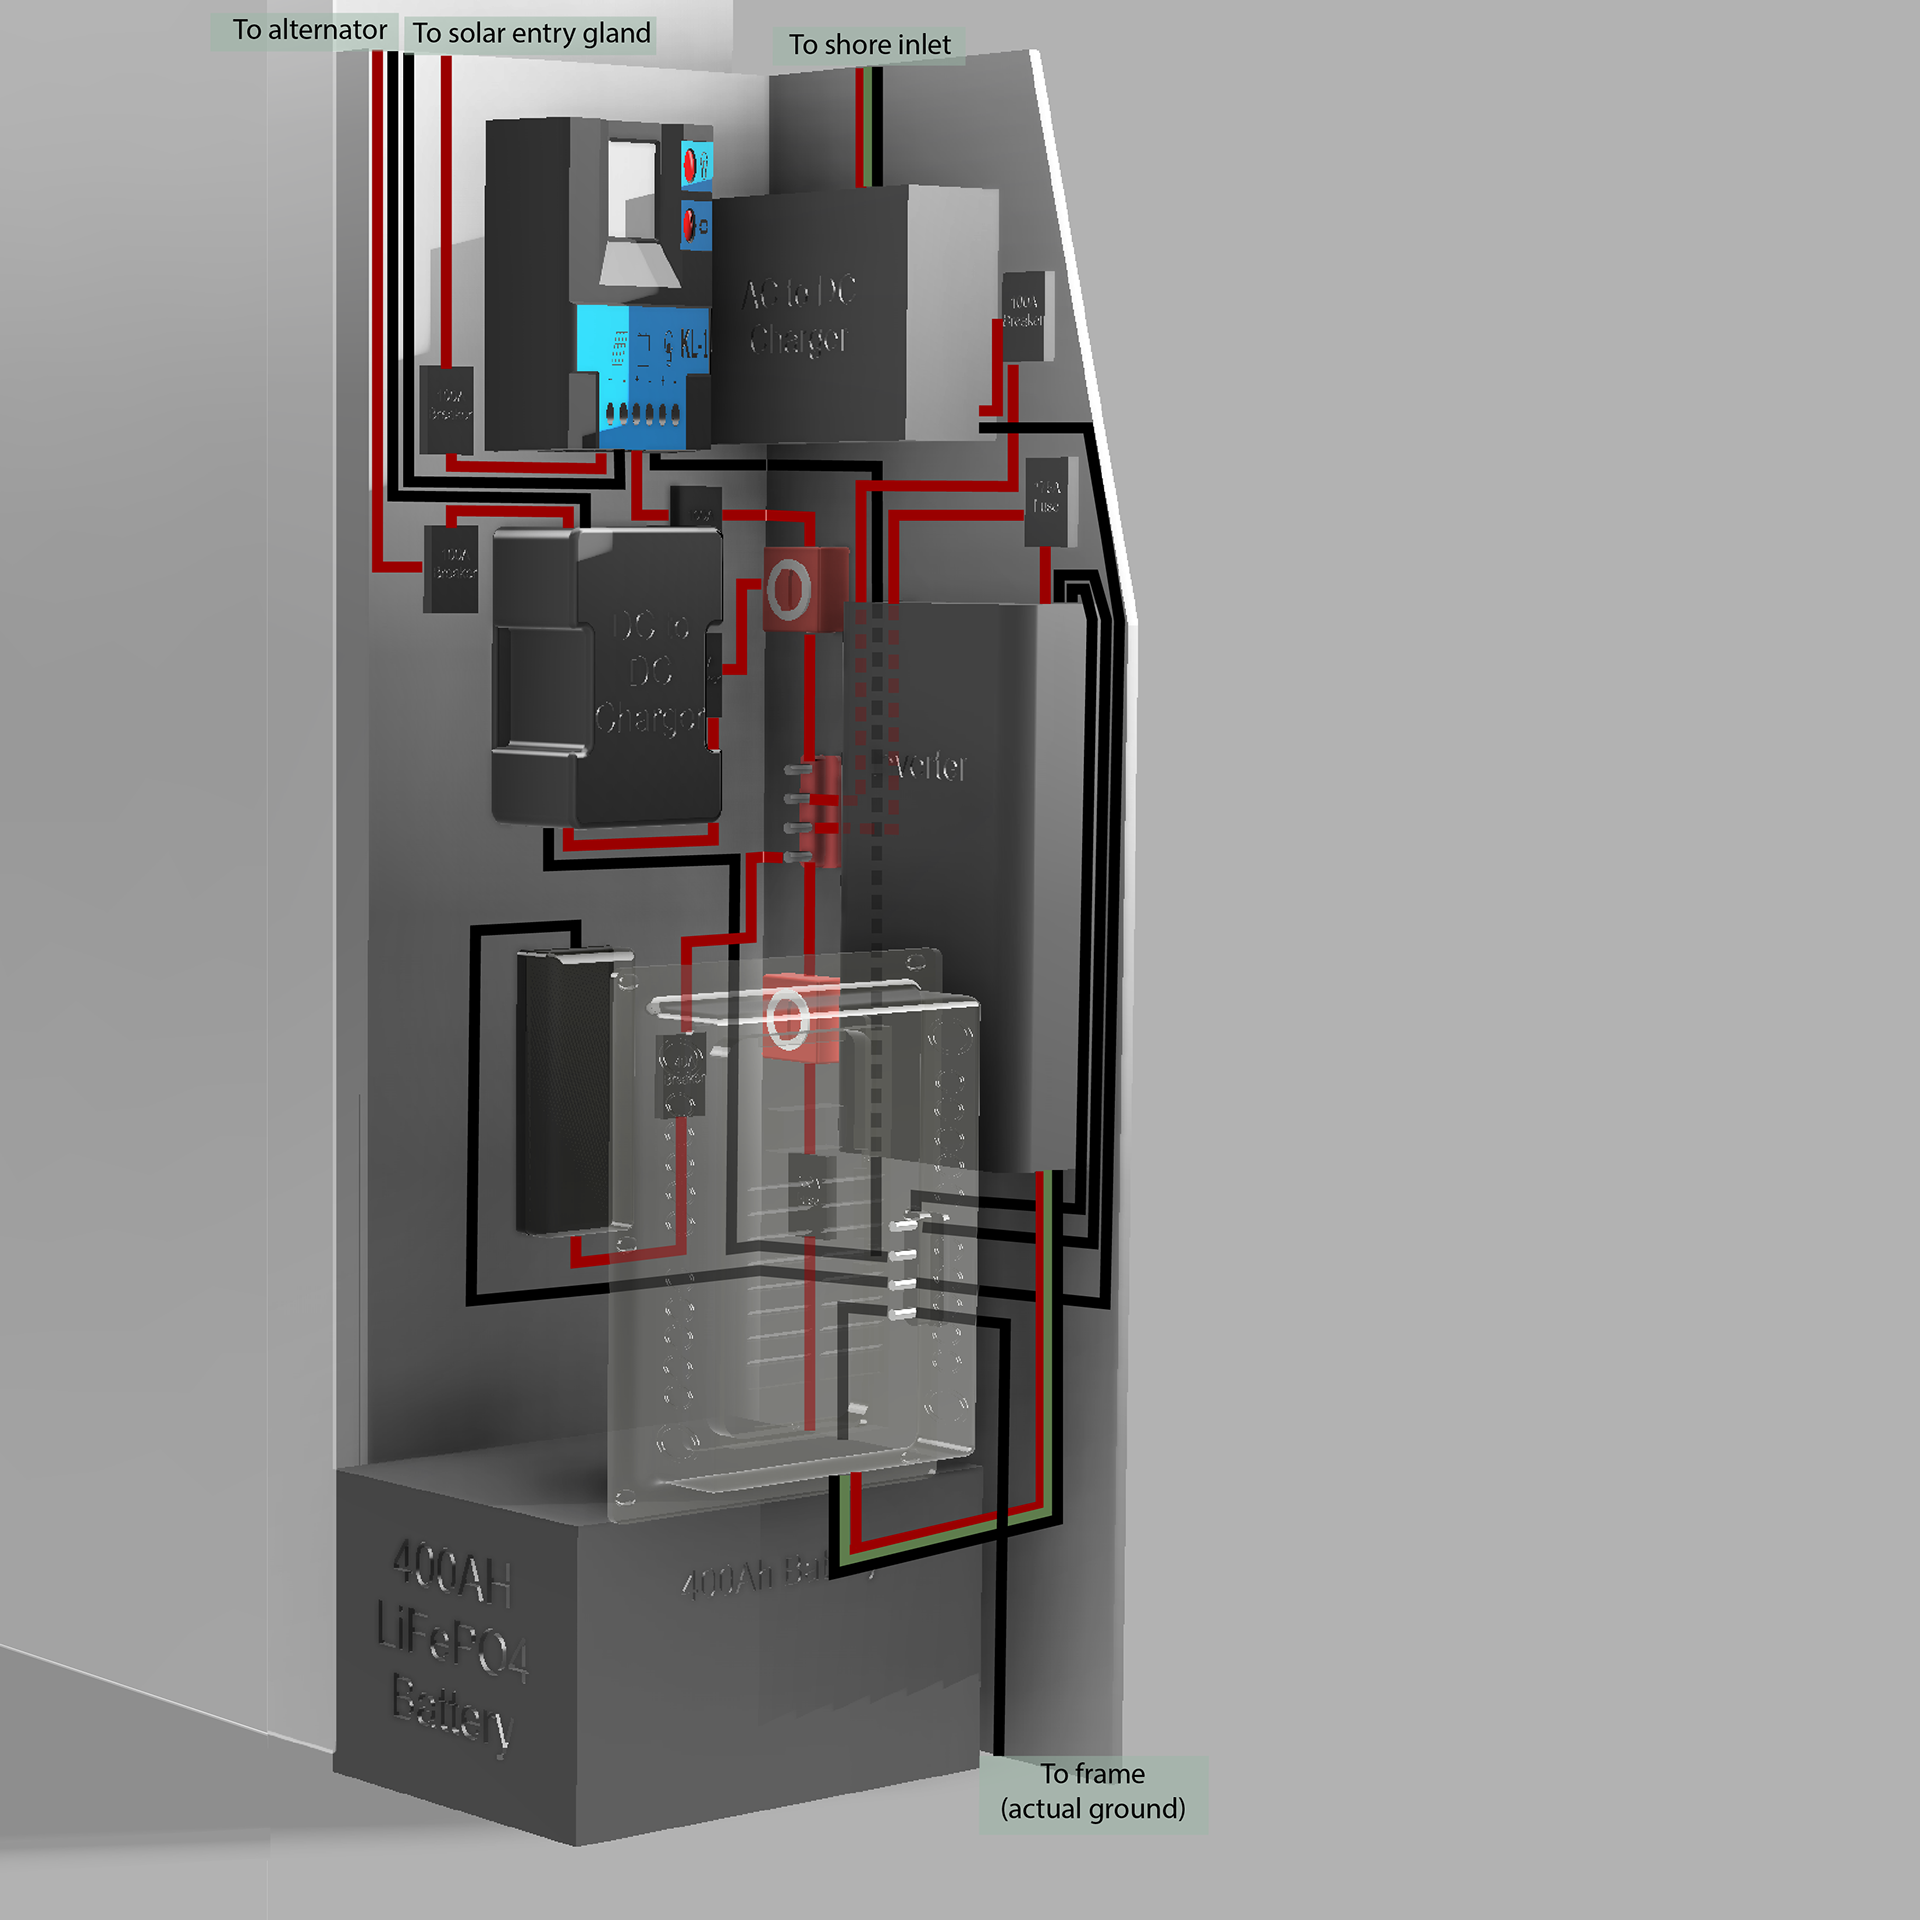
Electrical Closet Layout
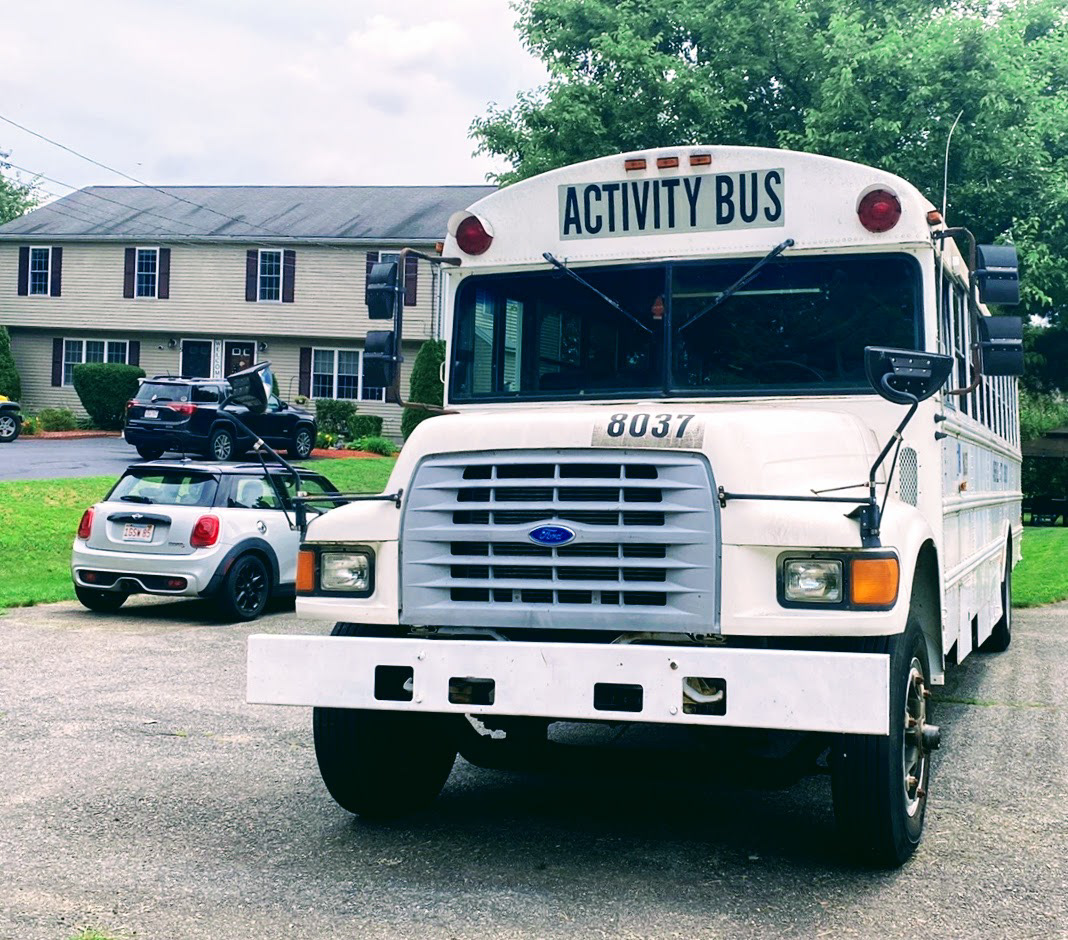
Our beautiful conversion canvas

Challenge
We had never attempted anything like this - how do you even begin? I had to learn how to wire AC and DC circuits using three different power sources, properly sizing wires and components so that we didn't end up burning the bus to the ground or being stranded without power in the middle of nowhere. I had to figure out how much water we'd need for a weeklong trip and how to plumb a camper. We had design cleverly, maximizing every small space for storage while still leaving enough garage space for the lumber we plan to haul for future construction projects.
Approach
YouTube became our best friend. Mike and I both have enough general building experience to know who to trust to teach us the finer details of bus conversion. In terms of design, we first decided the components that were most important to us: a queen size bed, an 8' long garage for lumber and sheet goods (and skis and snowboards, of course!), a kitchen with at least a sink, small fridge, and range, and separate toilet and shower rooms. We then used any remaining space to fit creative storage solutions: a bed platform on hydraulic struts, dining benches that double as storage, and a dining table that drops down to create a second bed.
Floor Framing
Floor Insulation
Subfloor
Wall Framing
Ceiling Framing
Insulation
Wall Sheathing
Back Wall Build-out
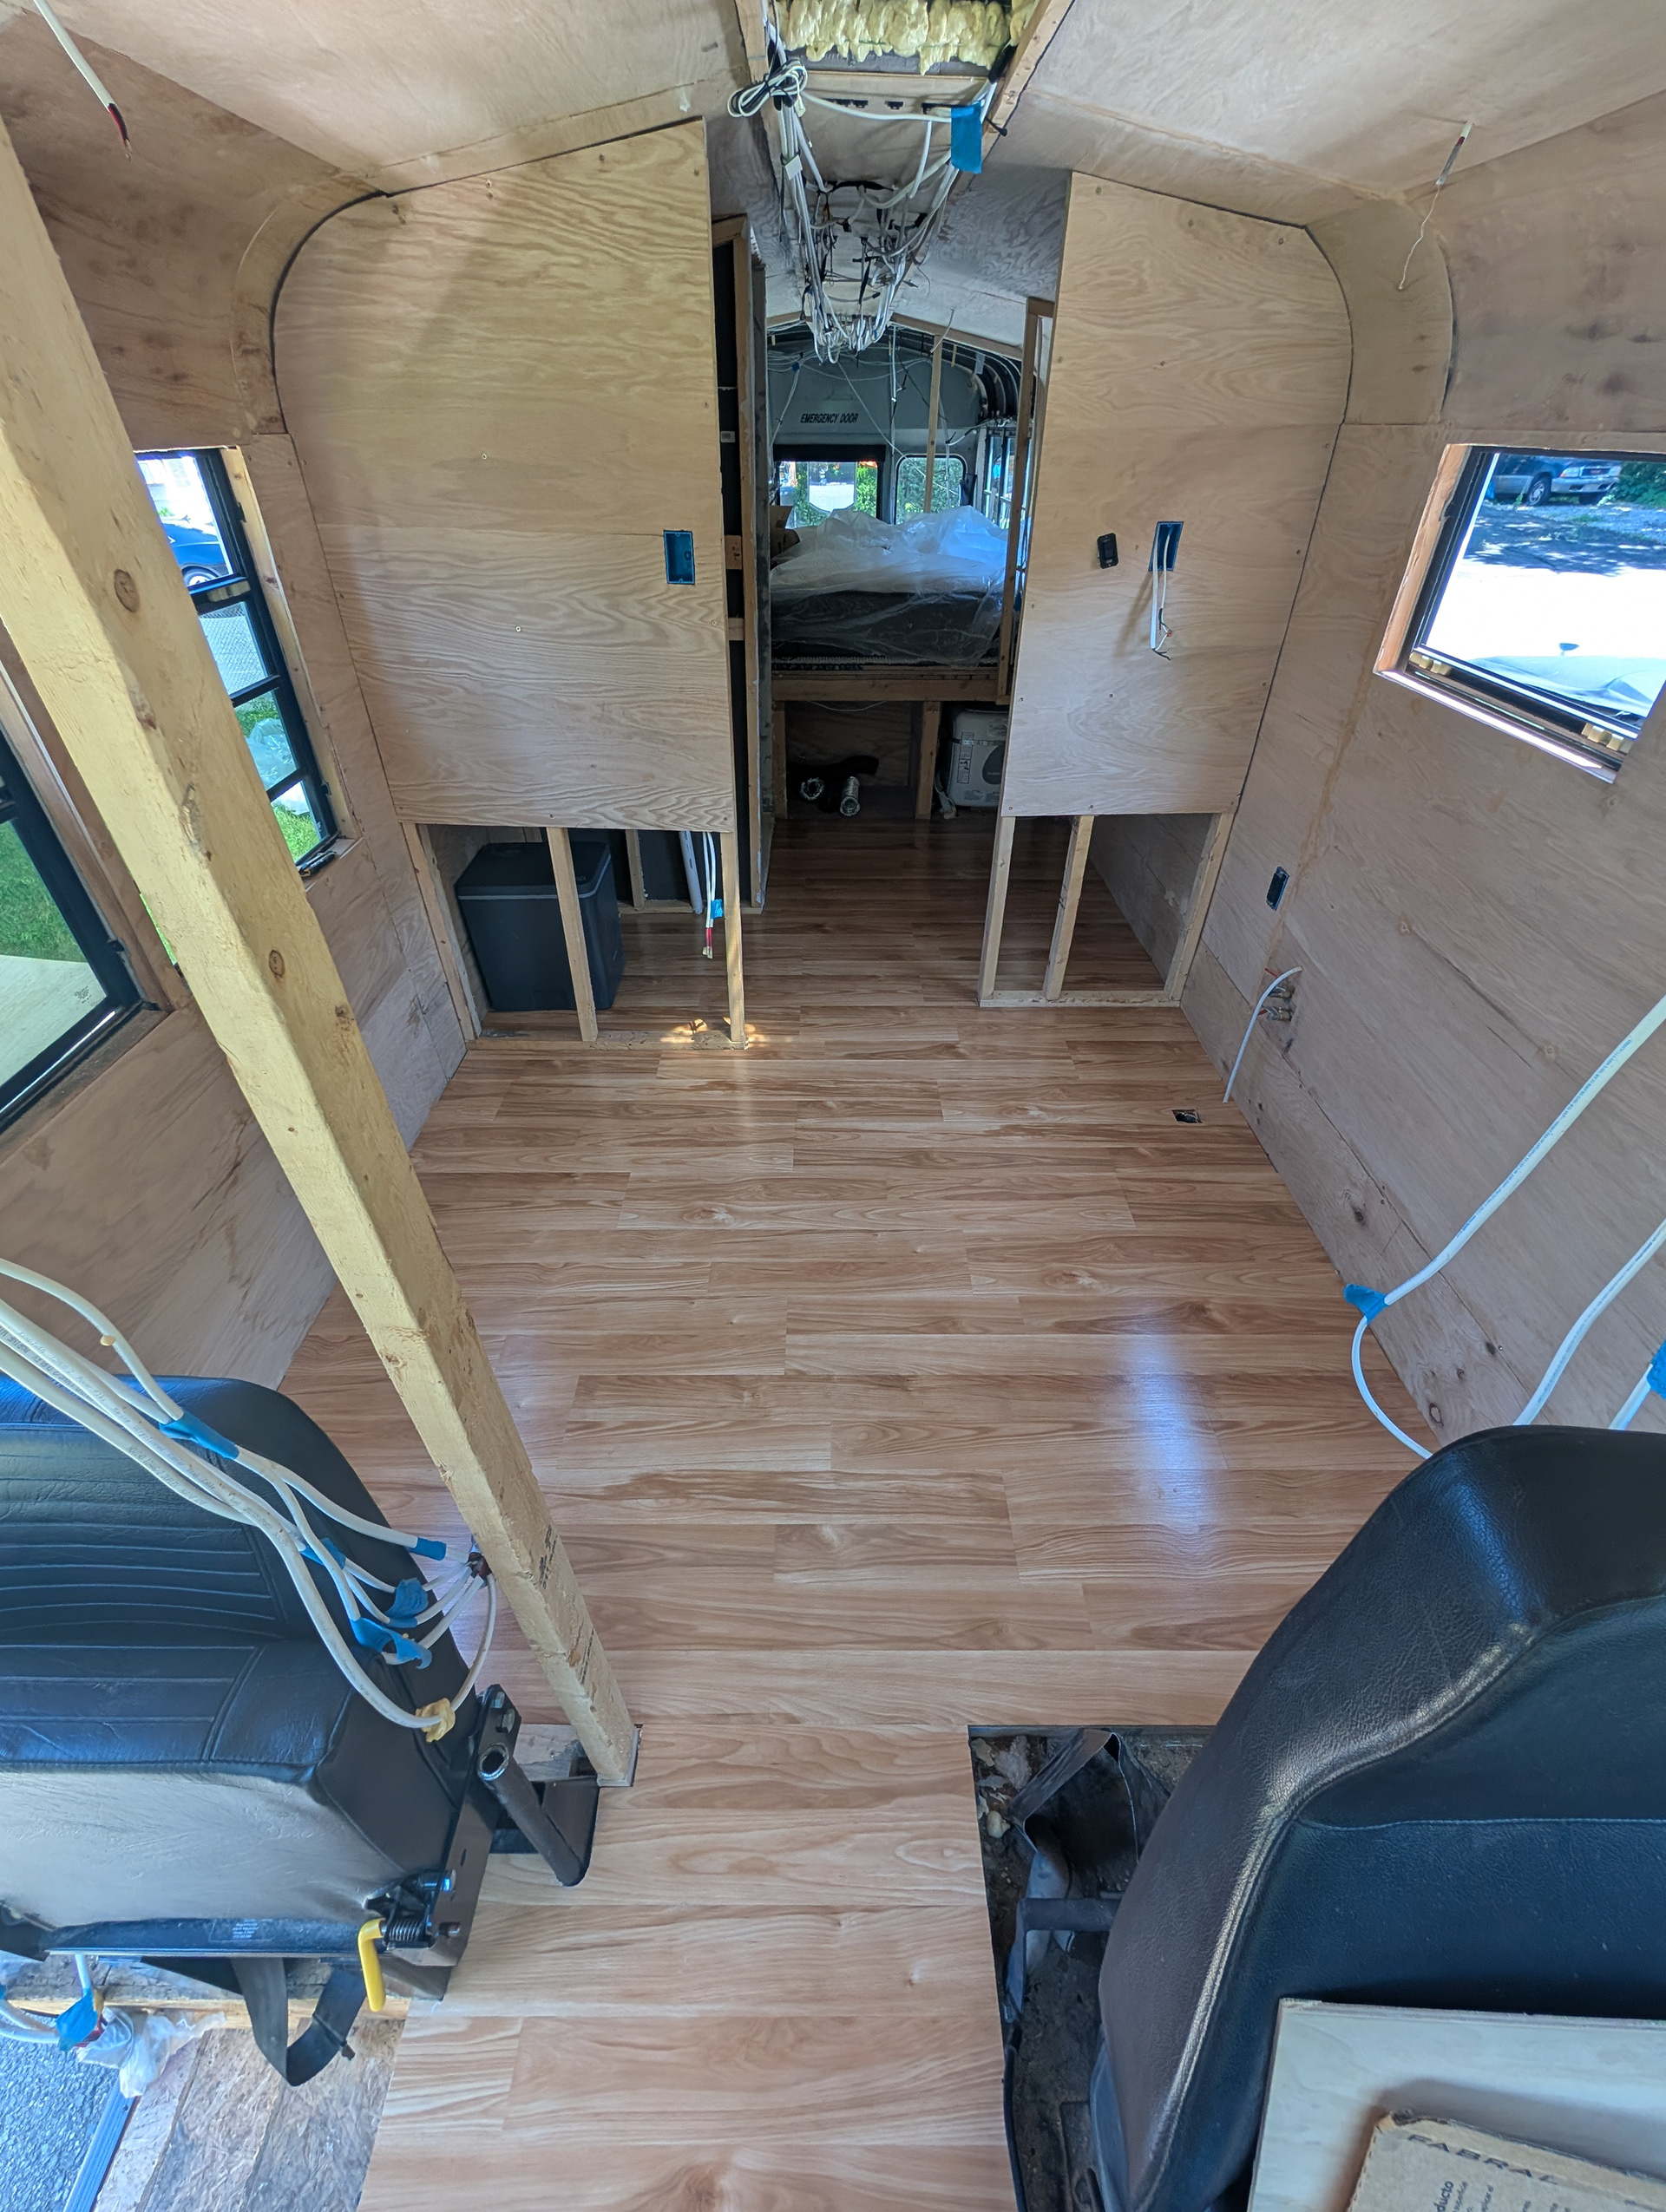
Flooring
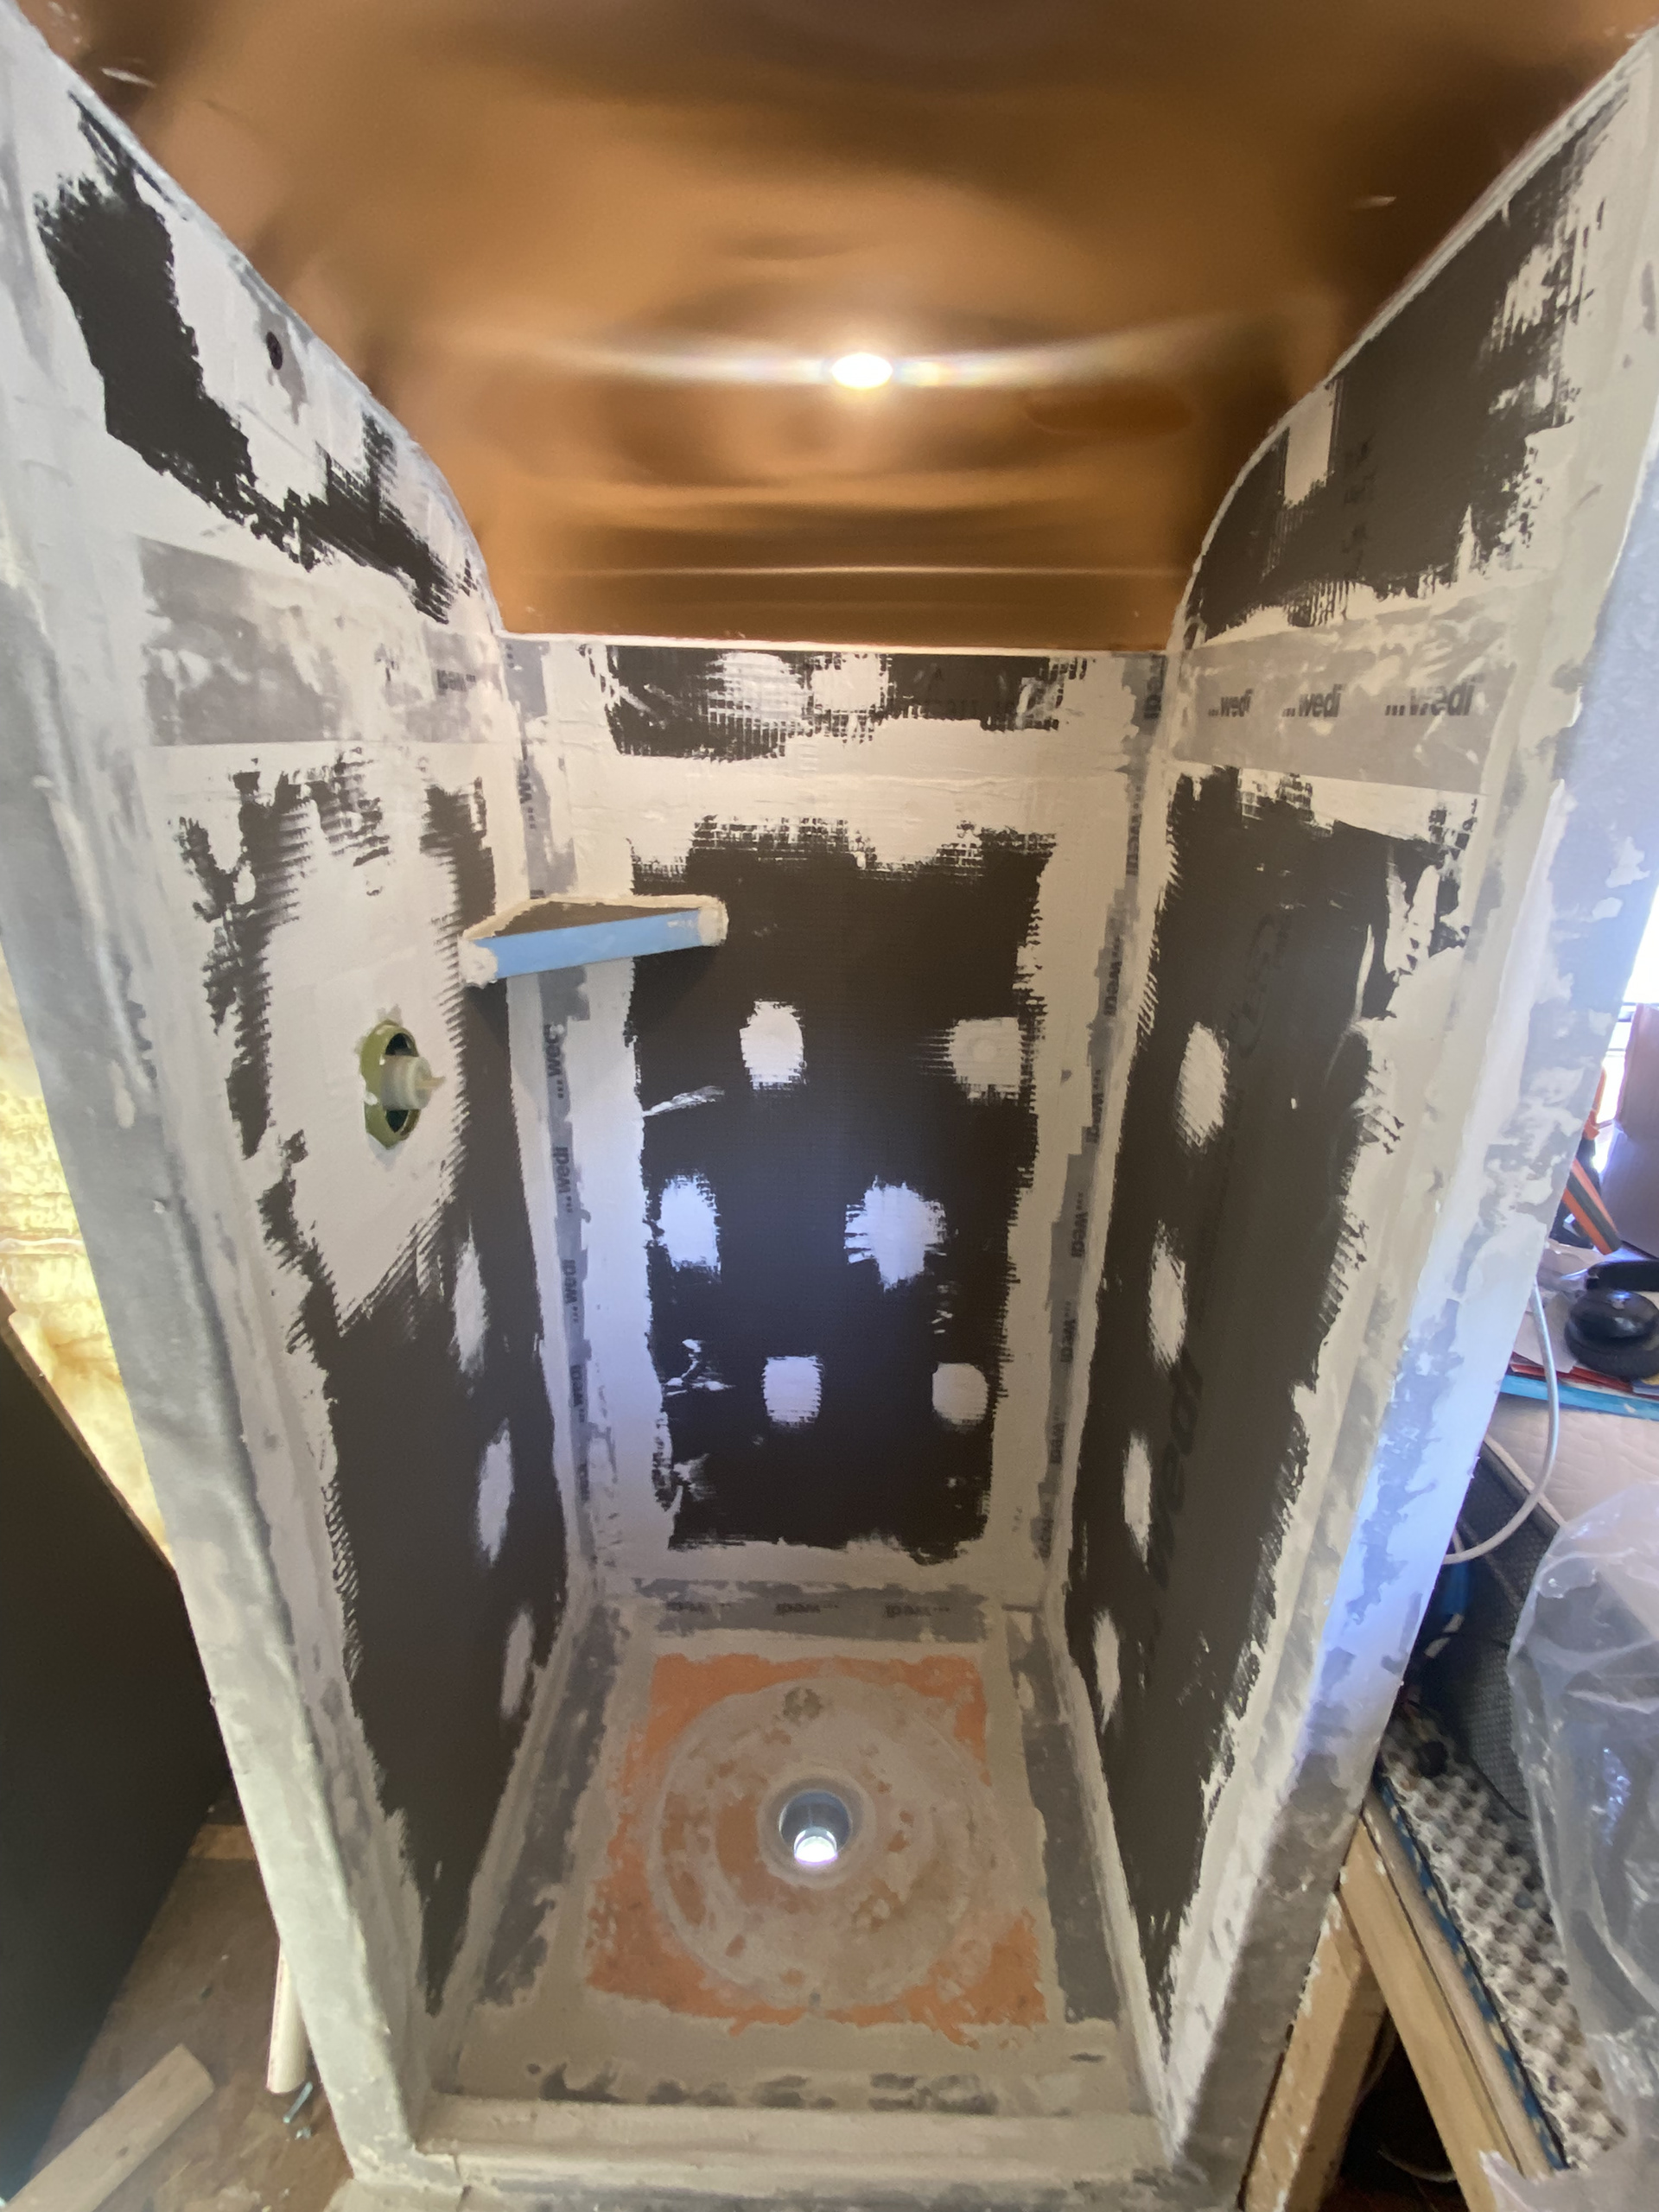
Waterproofed Shower
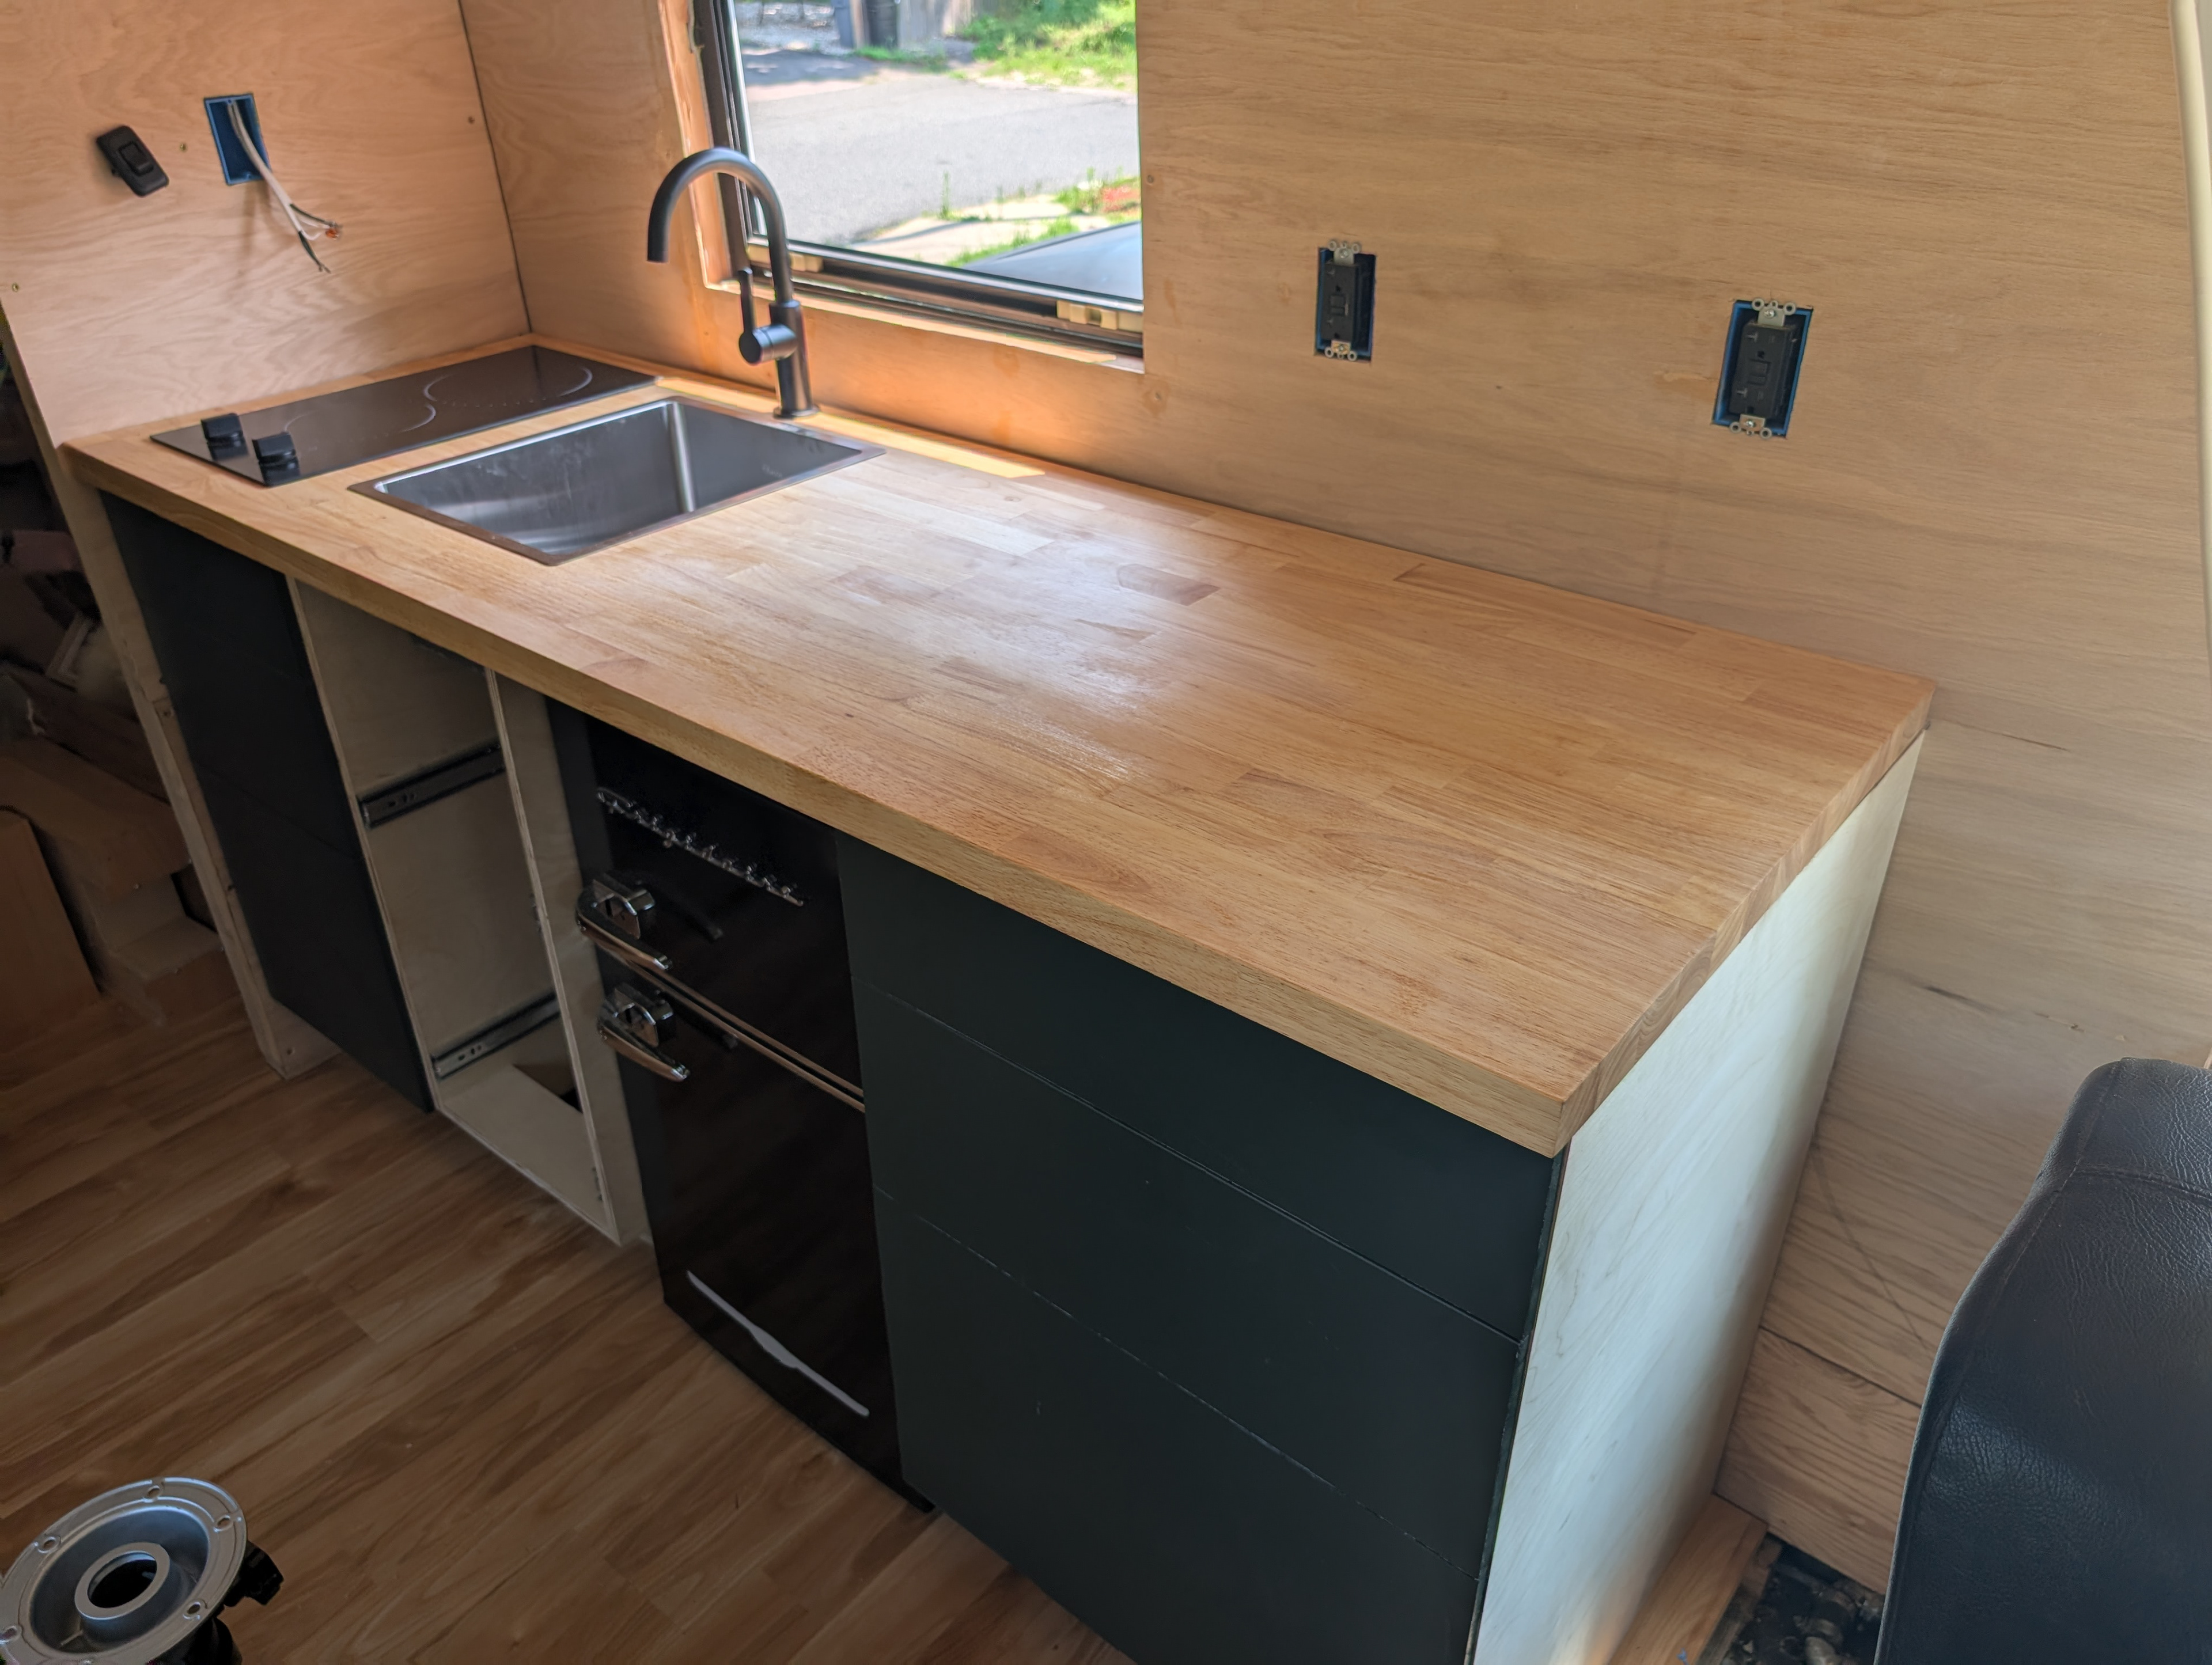
Kitchenette Cabinets
Running water!
Lighting
Mini Split AC
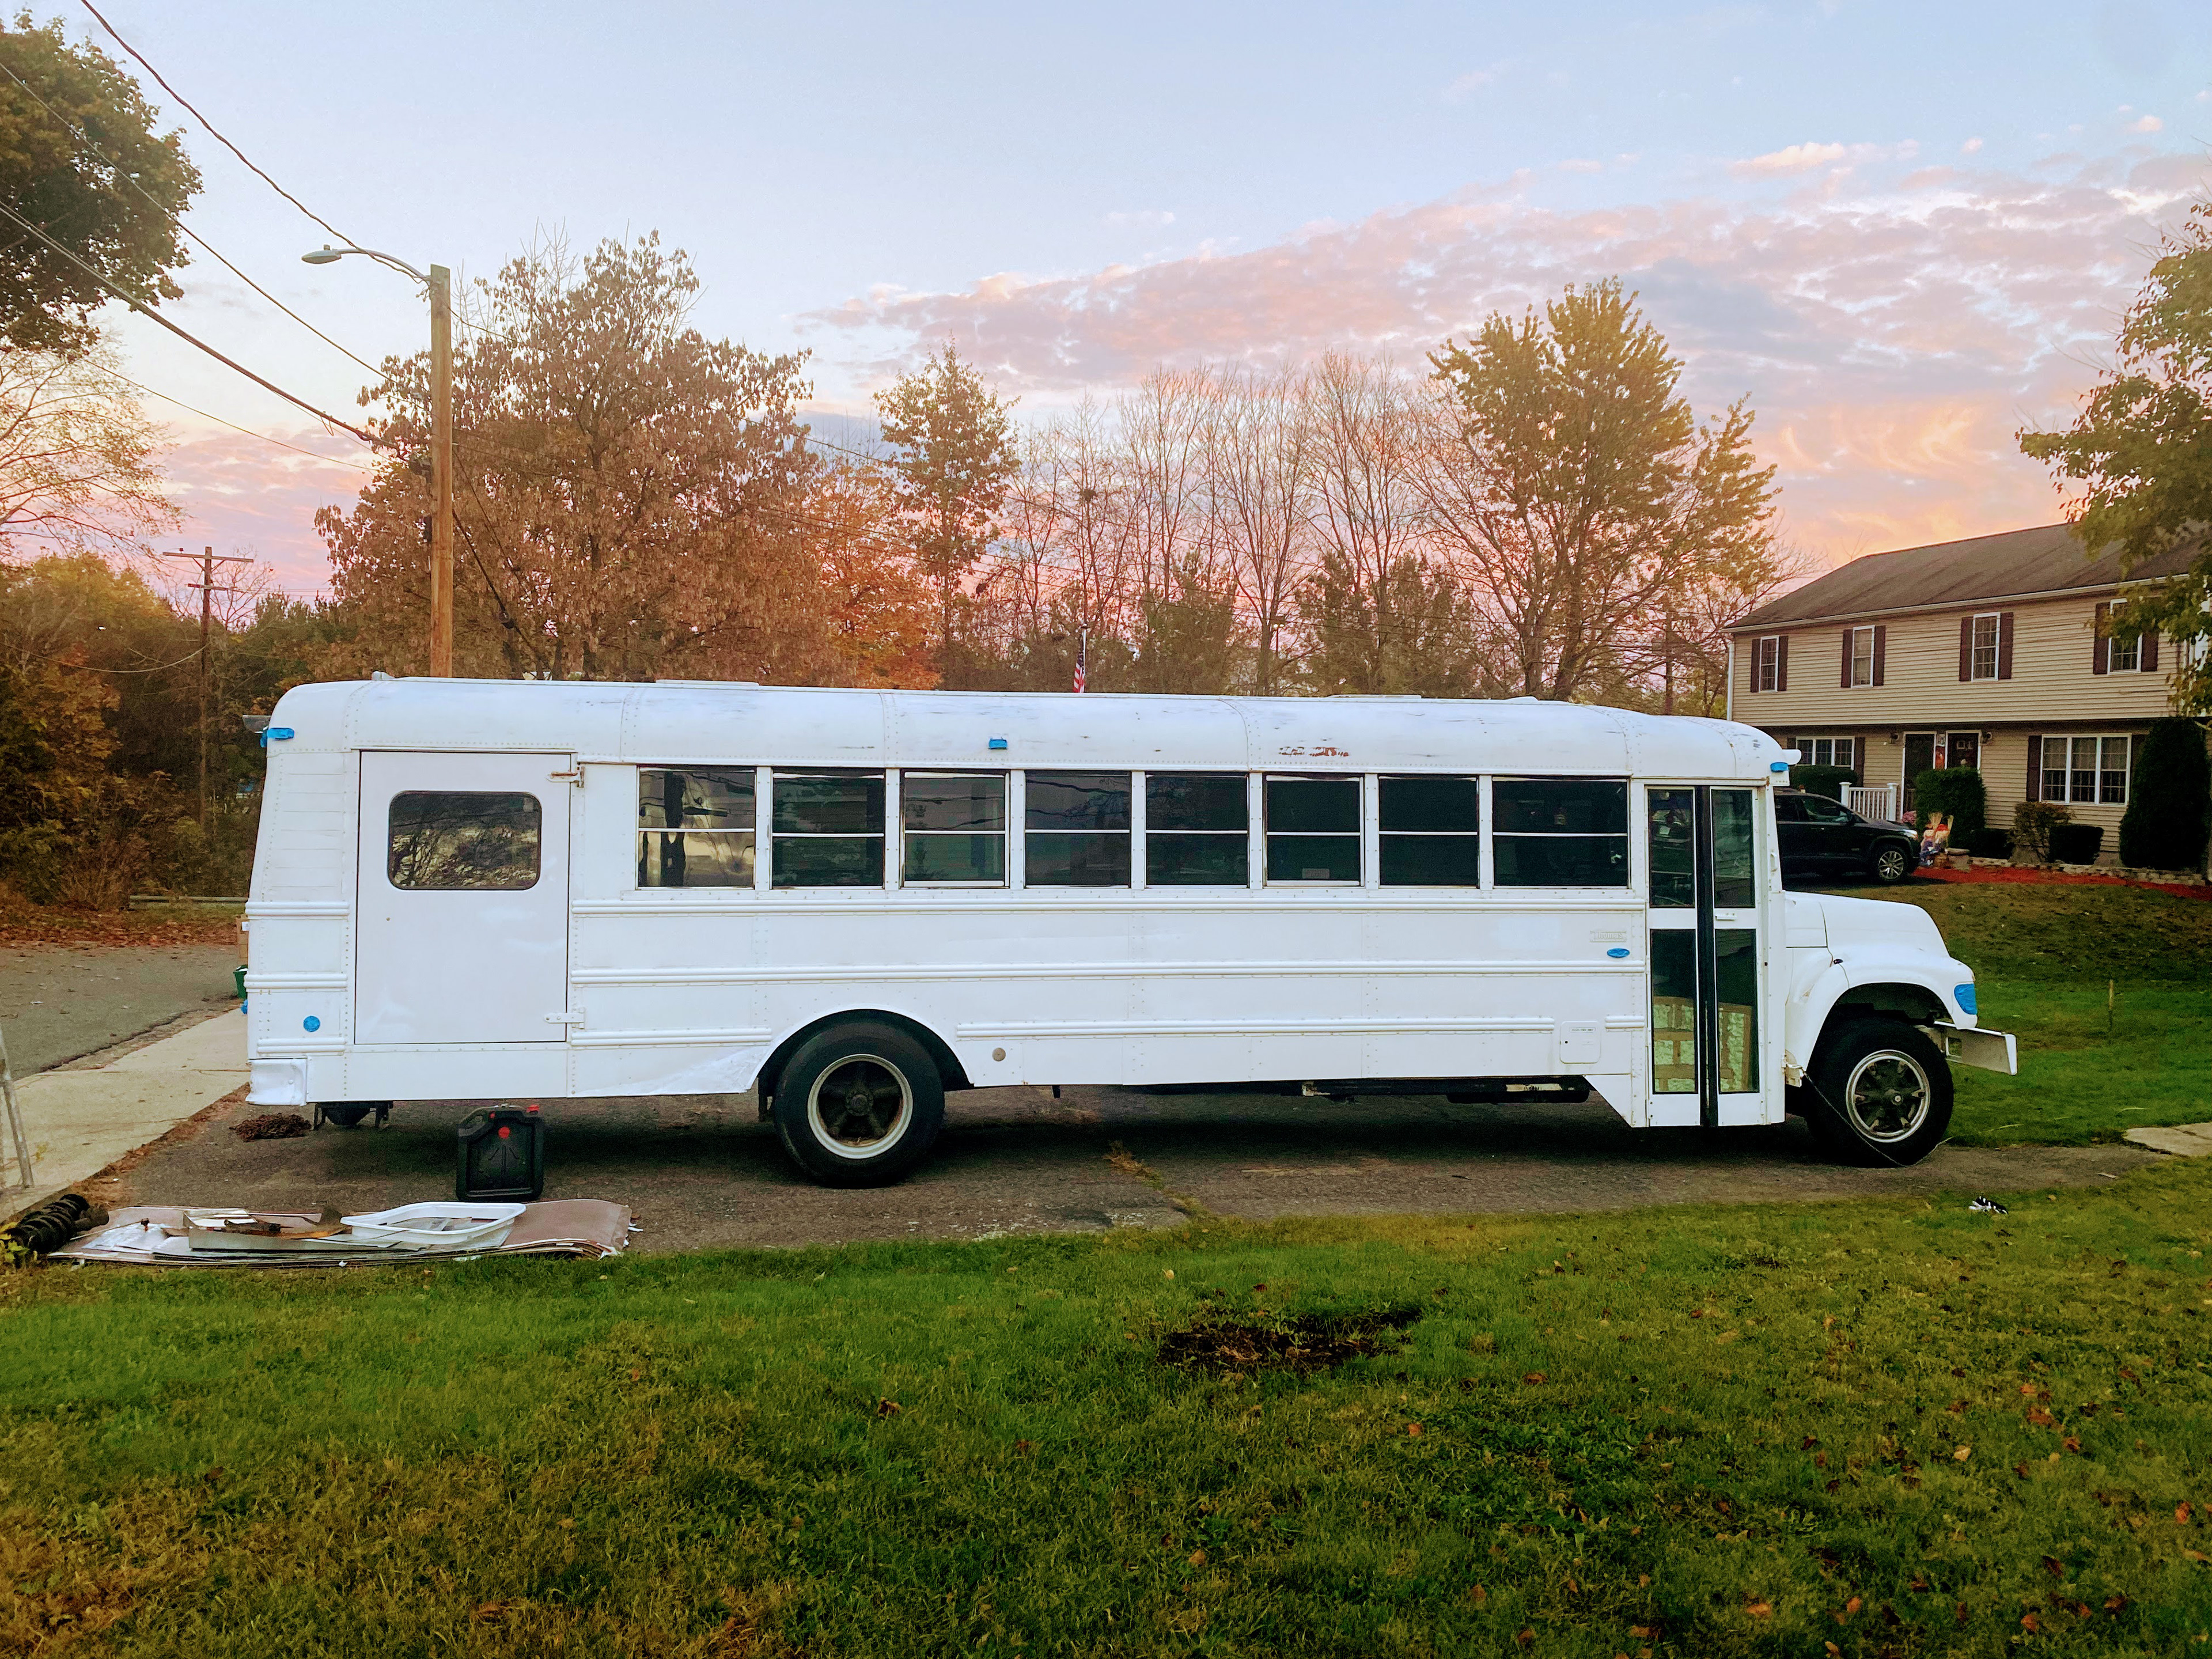
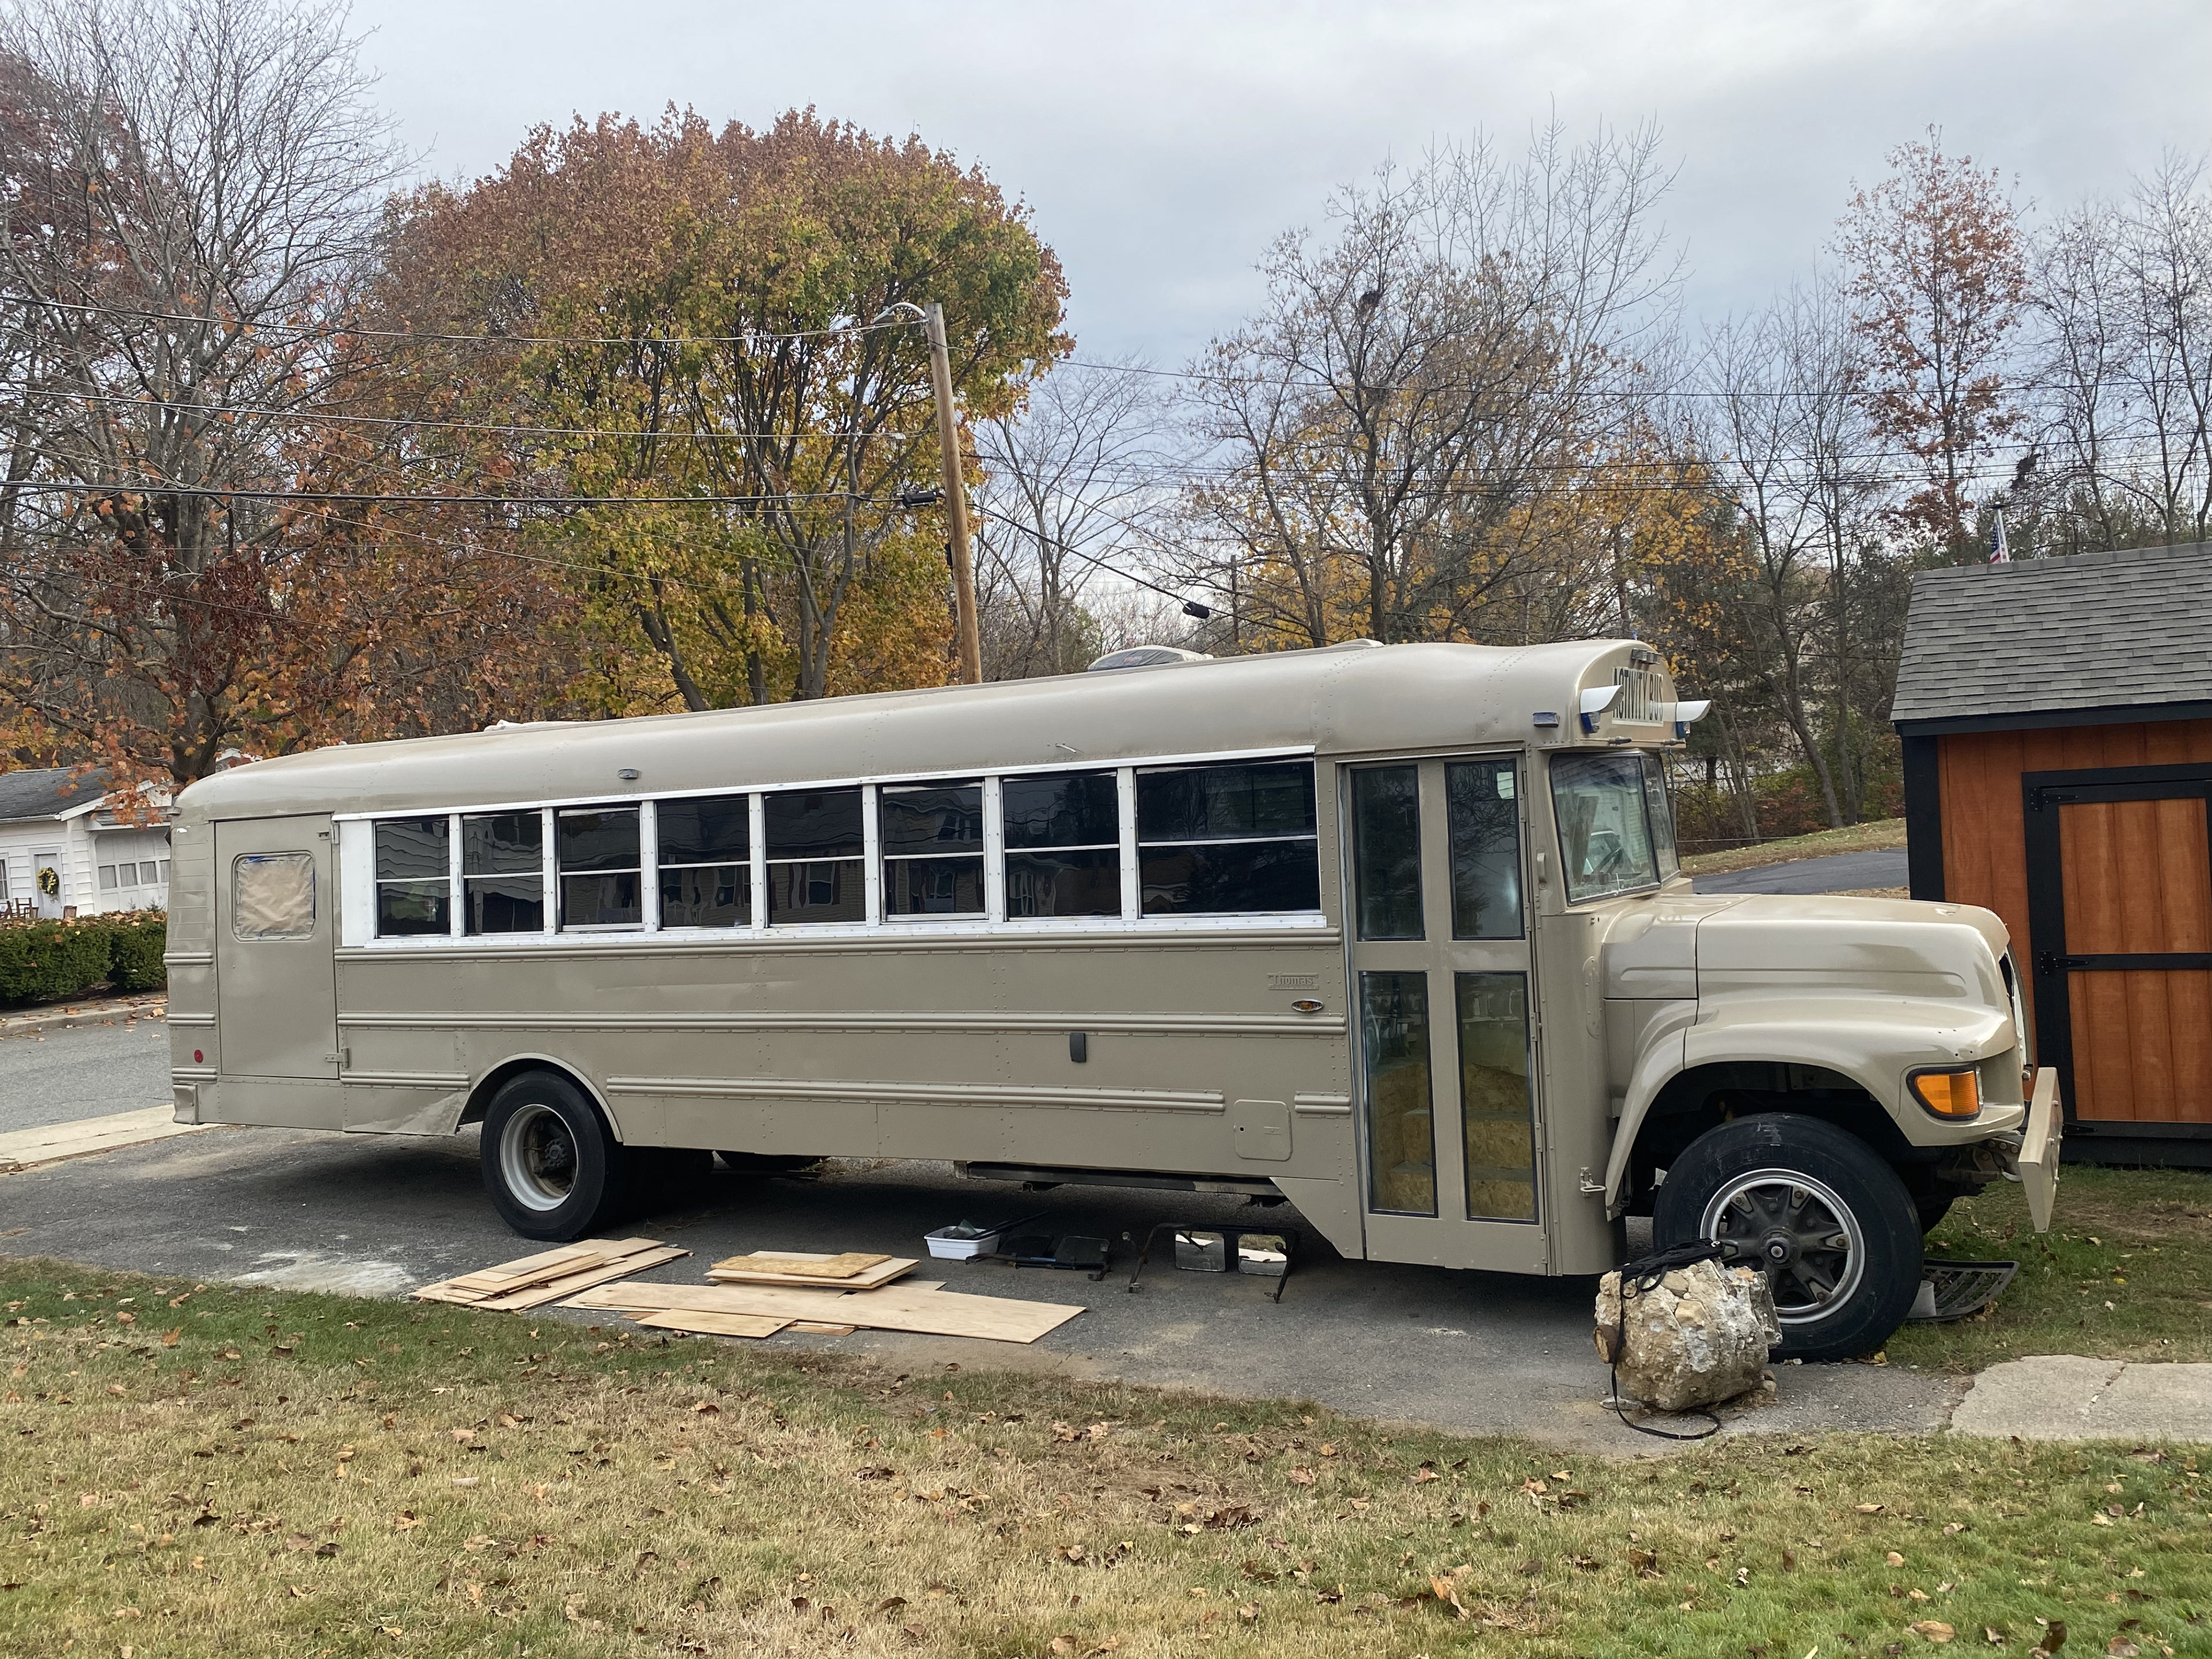
2 Doors. → 1 Door!
White Bus → Tan Bus
Process
The first step was making the inside of the bus look less like a bus....a lot of demo. We ripped out all 18 seats, pulled out the rubber floors, and stripped the walls and ceilings of their metal sheeting. Once we thoroughly cleaned the metal shell we unveiled of gum lollipop sticks and pencils from 1997, we got to work putting in our insulation and subfloor. From there, we framed out the walls and ceilings, which involved an ungodly amount of wood to metal screws, and built the bed platform (as it houses many of our plumbing components). With framing in place, we designed and installed the components in our garage's electrical closet and subsequently ran all of our AC and DC lines to their respective lights, outlets, etc. Before the insulation goes in, we also had to rough in all of our plumbing, which meant hooking up our fresh water tank to our infill, pump, accumulator, and hot water heater and running PEX to each sink and shower. After spraying our closed-cell foam, we took to the walls, putting up sheathing on the exterior walls and ceilings and framing out interior walls. From there, we were able to rough in the shower, adding Wedi board and drain, as well as our kitchenette, the cabinetry for which I built out from scratch. With the faucet connected to our fresh water tank and sink drain connected to our grey water tank we have running water - a very exciting step. We also installed a mini split and condenser for AC in the summer (we'll use our diesel heater in the winter to save battery).
Future
From here, I'm working on building out the breakfast nook benches and table (which will fold out to create a second bed) and adding tile, paint, and trim to walls. We're excited to finally get to see our vision come fully to life!